Lacing Up

Lacing Up

Hello boys and girls, it’s been a while since I posted anything new.  In fact it’s been more than a year.  Life sorta got in the way.  I’ve been thinking about getting back to this and so here it goes.

After lost my arm, one of the things that I tried to do on my own was tie my shoes. I was able to do it, but I was never able to get them tight enough to stay.  Within 20 minutes they’d loosen, I’d try again and they’d loosen again.  Wash rinse repeat.  I’d be frustrated and as a grown man I was gong to find a way to do this myself.

So I looked for and found three basic solutions, the first are slip ons like my harness boots, sandals, etc.  The second are stretchy shoe laces and the third are cord locks.

I won’t get in to the slip ons, I’m sure as an adult member of the reading public, I’d expect that you’ve come across those already.

When it comes to stretchy laces, most of these are made for sneakers.  The first laces I found were a product called Lock Laces.

https://www.locklaces.com/

https://www.amazon.com/dp/B007DLVLBQ/ref=twister_B00975EAJ6?_encoding=UTF8&psc=1

20170525_193741

These work great, but my only problem with them is that they don’t come in solid colors.  They all have the spots on them, which looks fine on sneakers, but not so much for anything else.  For a while they were all I could find too.  So I was using the Cord Locks that I’ll mention below.

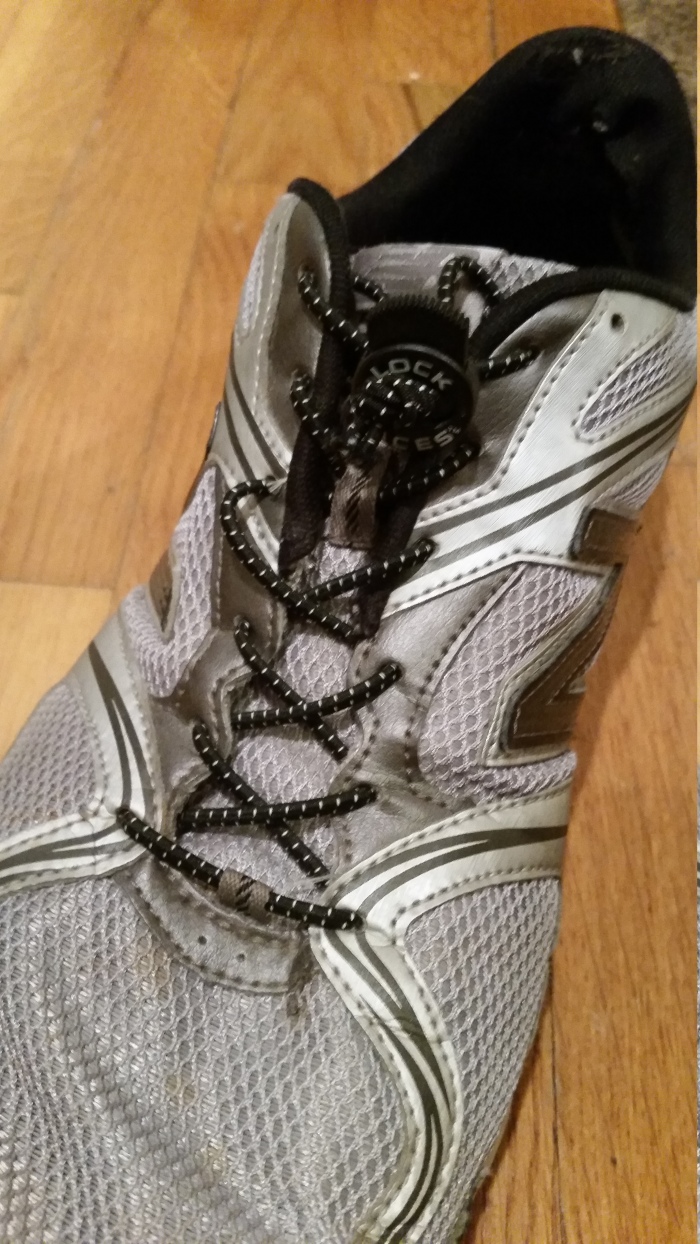
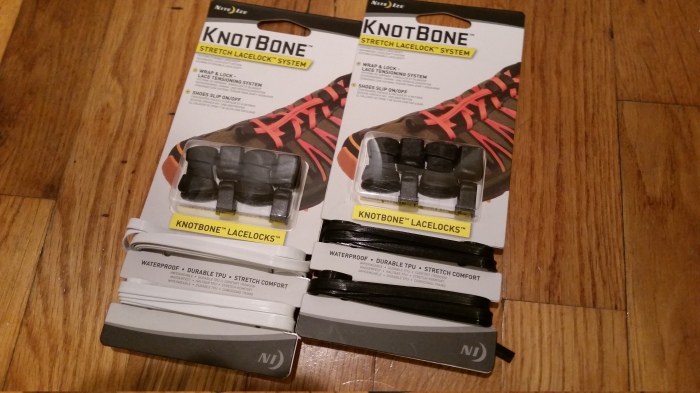
After a while however, I found that a company called Nite Ize which makes all sortsa doo-hickies and tchotchkes started making stretch laces in their KnotBone system.  These come in solid black and White among other colors.  They’re also flat like regular laces.  Which makes them far less noticeable and they can be put on dress shoes too.  Here’s a picture of them on my  sneakers.  These laces have taken a beating and hold up.

https://www.niteize.com/product/KnotBone-Stretch-LaceLock-System.asp

https://www.amazon.com/dp/B00SY16Y6Q/ref=twister_B00U1HU872?_encoding=UTF8&psc=1

20170526_220645

Also, since you can’t always just run down to the store for these, so I usually keep a couple extra pairs on hand just in case I get new shoes or a lace breaks.

20170525_193757

Now the stretchy shoe laces above will work for most shoes, however I also wear boots and these need longer laces than the stretchy ones come in.  In this case I use Cord Locks.  Most cord locks use springs and these can be hard to work one handed.  It’s difficult to keep the spring depressed and pull the laces through in the same motion.

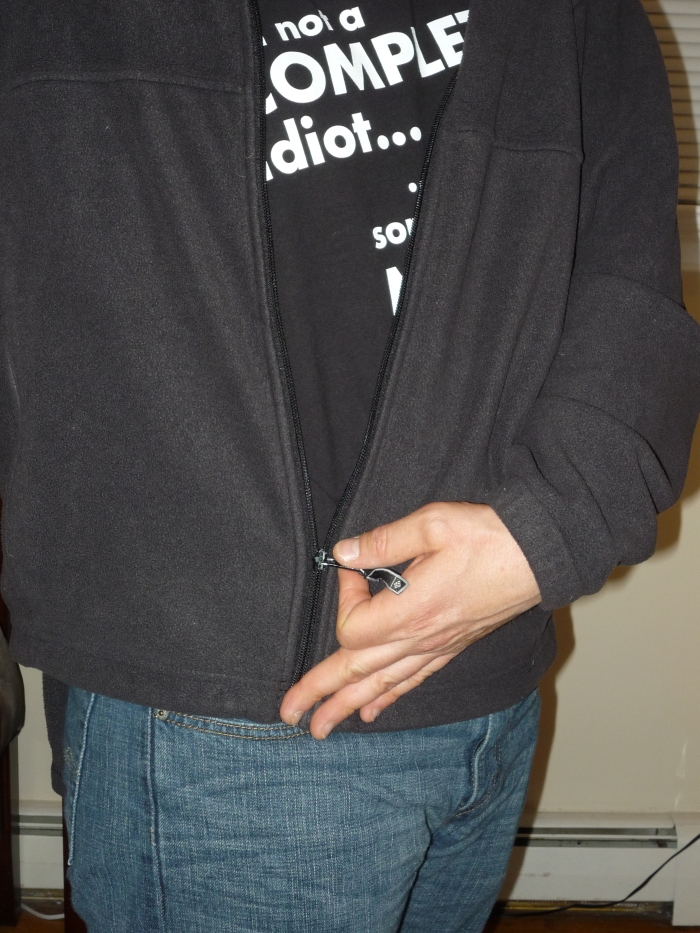
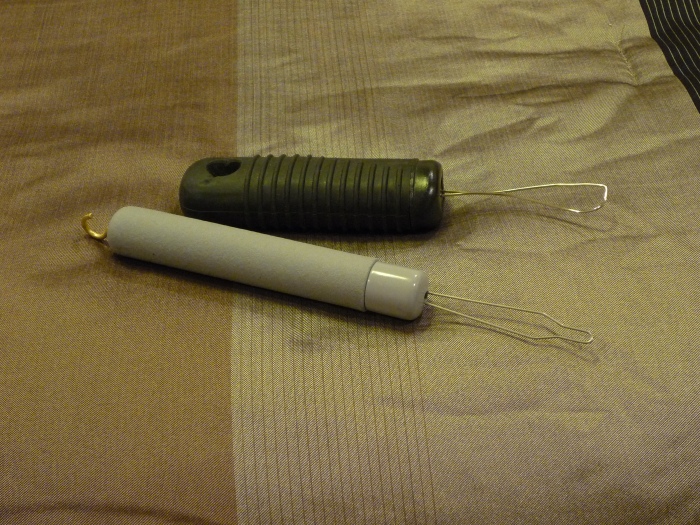
So I’ve been using these friction style cord locks.

194 CORD LOCK (3)-600x600

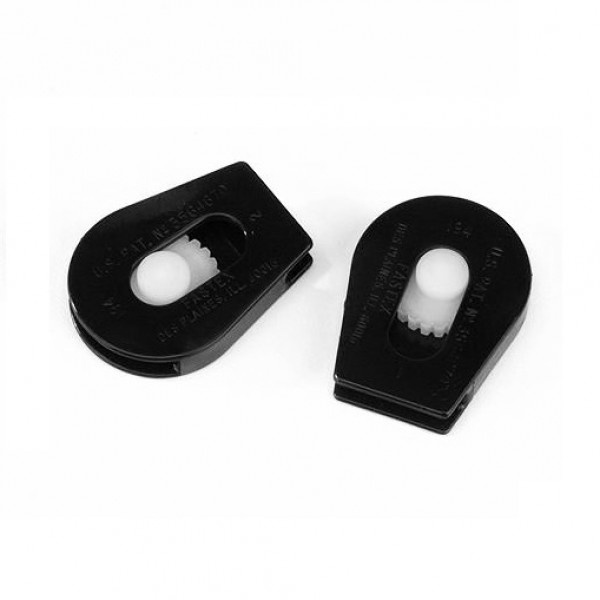
The thing with these is that I’ve found them in all sorts of prices.  On Amazon you have to buy a minimum of 25 which is going for $11.95 as I write this which is a really good price.  At one point I think I remember paying $10 for a pair on an “Accessibility” (cough cough… healthcare… cough… rip-off…) website so shop around.

http://na.itwnexus.com/content/cord-lock%E2%84%A2-194

https://www.amazon.com/dp/B06W2JXW1Q?ref_=ams_ad_dp_asin_1&th=1&psc=1

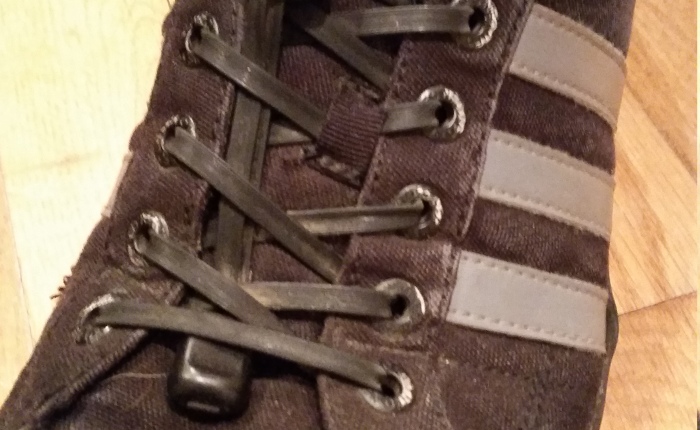
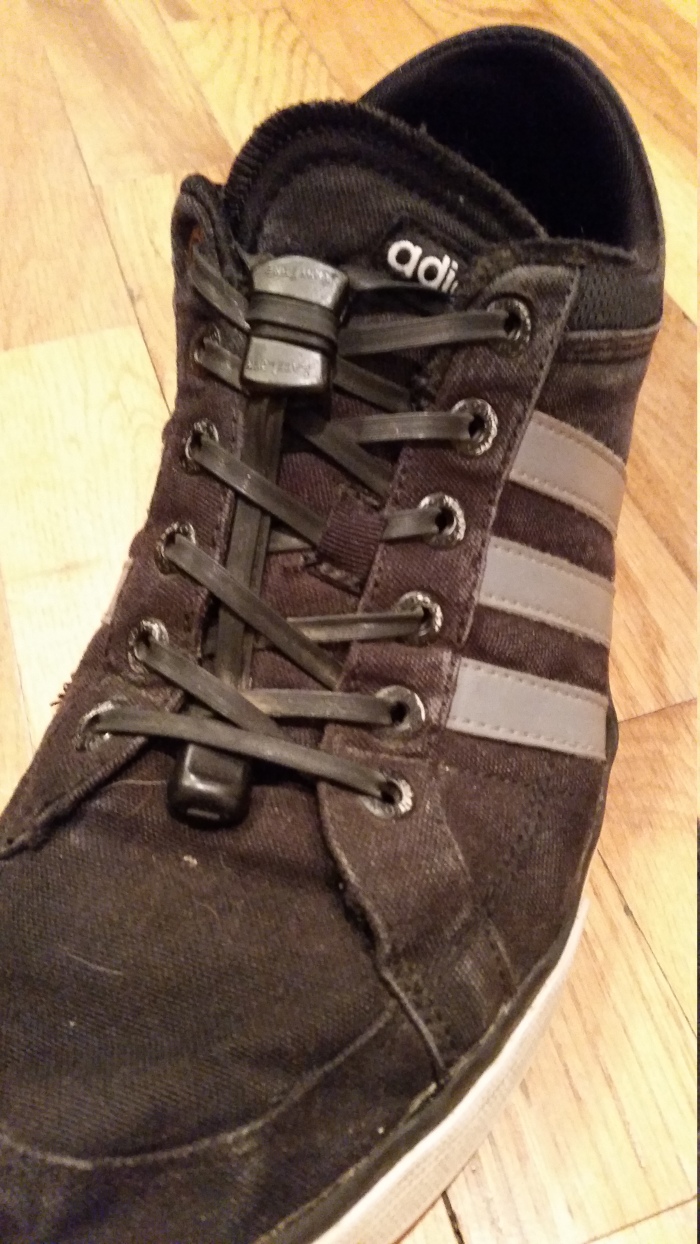
Here’s what they look like on my boots.  These have also stood up to a good thrashing as you can see.

20170525_193732

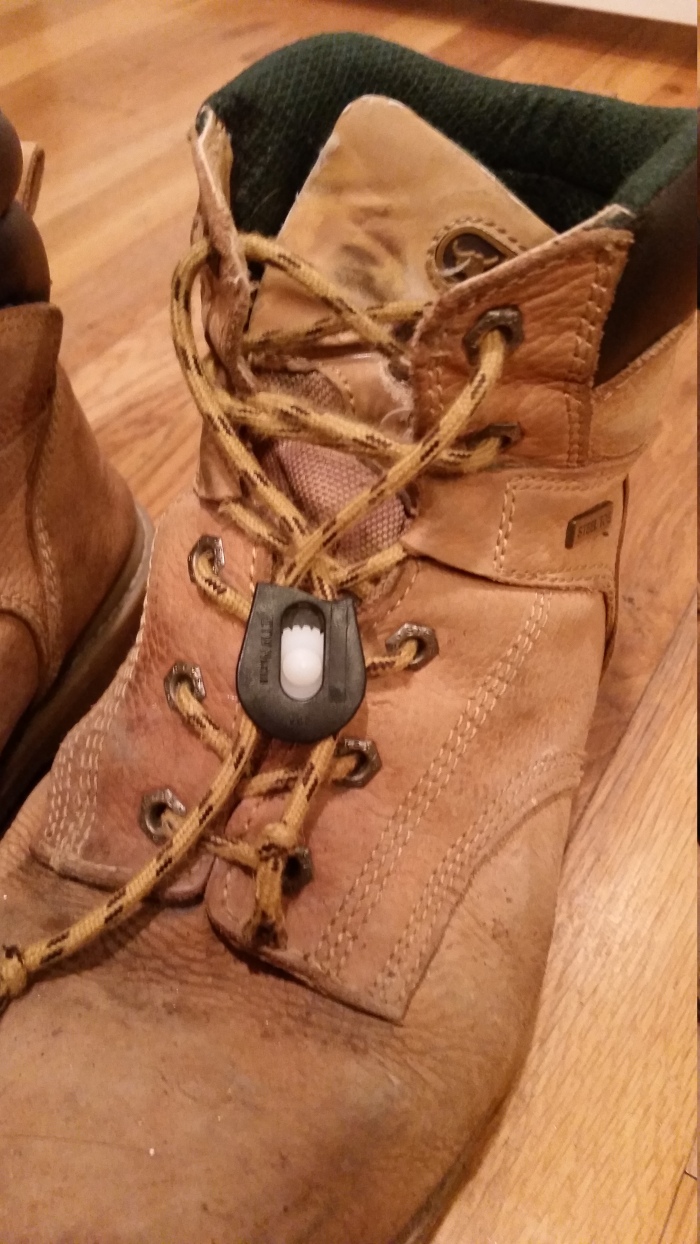
The stretch laces are pretty obvious on how to use them, but here’s a video of how I work the friction lock laces.

Puttin’ on socks..

Puttin’ on socks..

To my five followers..  (Hi ma…)  I know it’s been a while since I posted something…  Here’s something new for you…

Here’s how I put on my socks single handedly. It’s not that hard, but does take a little practice.

They do have adaptive devices for helping to put your socks on.  I think most are really geared for those of you who may have a problem bending over.

I start by inserting my thumb and one other finger in to the sock.   By spreading my fingers to stretch the sock, I apply tension to hold it on my fingers and open it at the same time.

P1000968

Next I slip the sock over my toes just far enough to get it to stay.

P1000970

P1000969

P1000971

Once its on my foot, I just work it up my foot and leg by grabbing it once side at a time.

P1000973

P1000972

Here’s a video of the whole process in action.

Clothing Zippers

Clothing Zippers

Zippers are my nemesis!  Oh you little evil things!

In actuality, the ones that exist on my sweatshirts and jackets I have mastered.  It’s the little bastards that exist on small bags like my travel shave kit and my growler carrier that are evil beings!

All kidding aside, you’re here to find out how to zipper your jacket one handed.  This is another technique that I had to figure out on my own.  Lets get to it…

I start by lifting the side of the sweater that has the zipper pull on it and pinching it between my chest and my chin.  Making it short allows me to see what I’m doing and also prevents the pull side from moving around to much as I insert the other side.

P1000905

Next I insert the other side in the normal fashion.

P1000906

I use my thumb and index finger to pull down on the side without the zipper pull and my middle finger to push up on the bottom of the pull to hold everything together.  While doing that I let go with my chin and lower the shirt.

P1000907

I stretch the shirt to get the sipper as straight as possible.

P1000908

Using my thumb and Index fingers on the zipper pull  and my middle and ring fingers to hold the shirt, I work the pull up the first couple of teeth.

P1000909

Then just work the zipper up repeating these last two steps.

P1000910

And here’s the obligatory video of the technique in action.

Shirt Buttons

Shirt Buttons

As promised in my previous post, I want to show you how I button my shirts.

This technique is a little different and a little bit the same.  So follow along…

As before, I start by grabbing the button hole side.  This time using my thumb to both find the hole, and open it.

P1000897

I pull the hole over to the button and start to thread the button in to the hole.

P1000899

As the button comes through the hole, I tip it up on end and use my index finger to slide the shirt down over the button.

P1000901

Then with my index finger and thumb, I twist the button, which pulls it through the rest of the way.

P1000902

Here it is buttoned.

P1000903

And here’s the video of the process in action.

Pants Buttons

Pants Buttons

After the wreck, I had to figure out how to get dressed on my own.  This and the next two posts will be about dealing with that.

So after my hospital stay, I ended up in a Rehab facility.  While there I had Occupational Therapy.   While the OT therapists were good, they didn’t have much experience with an Arm Amputee. And why should they?  80% Of upper extremity amputations are just fingers and even then upper extremities only account for 5.4% of all amputations.  (These numbers come from the Amputee Coalition numbers for New York which is where I live and the wreck happened.. At the time of this writing, I’m not in anyway affiliated with the Amputee Coalition) Due to their lack of experience, they weren’t able to effectively teach me techniques for day to day living without my arm. So I had to use my strongest muscle, the one between my ears.

Let’s get started..

When I was in rehab, OT  got me these button tools.  They’re a wire loop on a handle that allow you to guide the button in the hole. They work, but they are accessibility tools, as I’ve mentioned in other posts, I try to avoid accessibility tools when I can. If you forget to bring it on vacation, you’re screwed.  Also it’s one more thing you have to bring and when you travel by motorcycle, like me, the less crap you bring the better!

I also found that they get hung up on the button making them difficult to work with and more importantly, I found I don’t need them.

P1000913

Let me show you how I button up.  I use two different techniques, one for my pants and one for my shirts.  Since I put my pants on first, I’ll start there.  I’ll document the technique for shirts in a second post.

In the pictures, I’m wearing loose fitting jeans to make taking pictures easier.  I also suggest you learn this technique with loose fitting clothes as it’ll be easier to learn.  Once you get the hang of it you can go back to wearing your skinny jeans. (I hate to see her leave, but I love to watch her go…)

I start by putting my middle finger through the button hole.

P1000887

Then pull the hole side of the pants to the button side, with my middle finger and grab the button side with my thumb and index finger.

P1000888

Now using your middle finger, find the bottom of the button.

P1000889

Next you’ll use your middle finger as a guide by tipping the bottom of the button up with your middle finger that’s still in the button hole.

P1000891

Then using your Ring Finger and your Index finger, push the button hole side of the pants down over the button.

P1000892

At this point the button is at a 45 degree angle and almost all the way through the hole, to hammer it home, just press down on the bottom of the button with your middle finger and upward angle on the thumb, while still holding the hole side with your index and ring fingers.  This rotates the button from 45 degrees to 90 degrees perpendicular to the floor and pushes it the rest of the way through the hole.

P1000893

P1000894

Here’s the video of it in action: